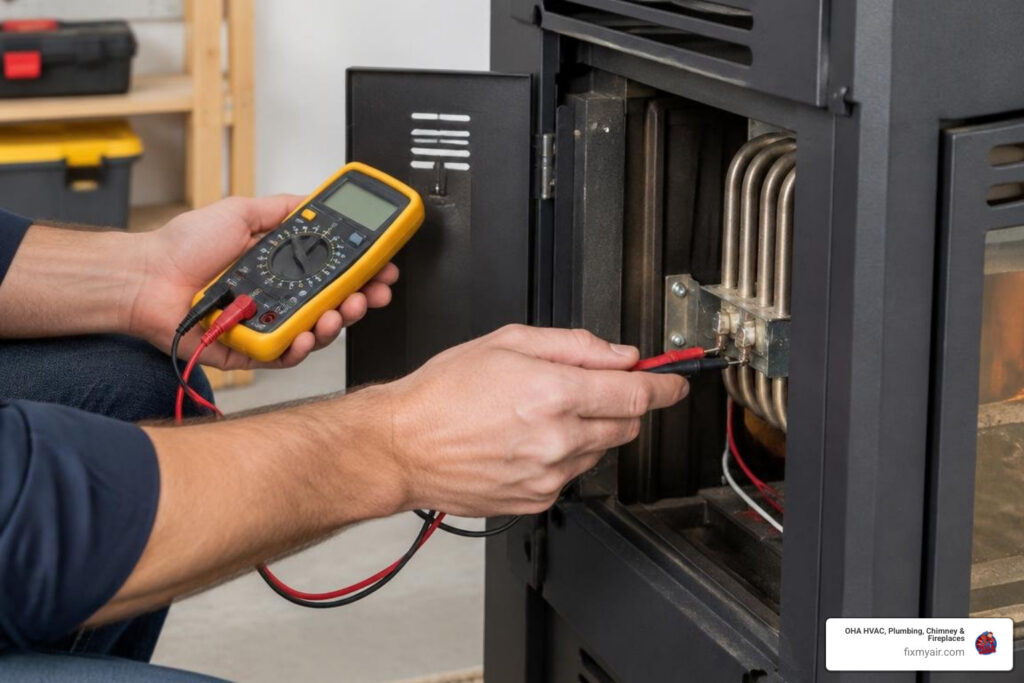
Identifying Common Failures and Diagnostic Procedures in Pellet Stove Repair
Common pellet stove failures include a clogged burn pot, faulty igniter, jammed auger, tripped vacuum or high-limit switches, and a failing convection blower. To diagnose, start by cleaning the burn pot air holes, testing the igniter resistance (30–60 ohms), checking the auger for jams, and verifying that safety switches are closed. If the stove shuts down after 10–15 minutes, suspect the proof-of-fire sensor. A lazy, sooty flame often indicates restricted airflow or a failed combustion blower. These checks address the most frequent issues before winter.
Pellet stoves combine mechanical, electrical, and pneumatic systems. When any of these systems slip out of balance, performance drops quickly. Knowing how these components interact makes it much easier to isolate a problem.
The burn pot is the heart of the combustion process. Over time, heavy ash, clinkers (hardened ash deposits caused by high mineral content or poor combustion), and unburned pellets clog the air inlet holes at the base. This starves the fire of oxygen, causing a lazy, orange, sooty flame.
Safety switches also play a critical role. The vacuum pressure switch monitors negative air pressure inside the firebox and exhaust chamber. If exhaust passages clog or the door gasket leaks, this switch trips and stops the auger from feeding pellets.
Similarly, the high-limit switch monitors chassis temperature and cuts power if internal heat climbs too high, protecting the electronics from thermal damage. A failing convection fan (room air blower) is a frequent cause of high-limit trips because it fails to pull heat off the heat exchanger tubes.
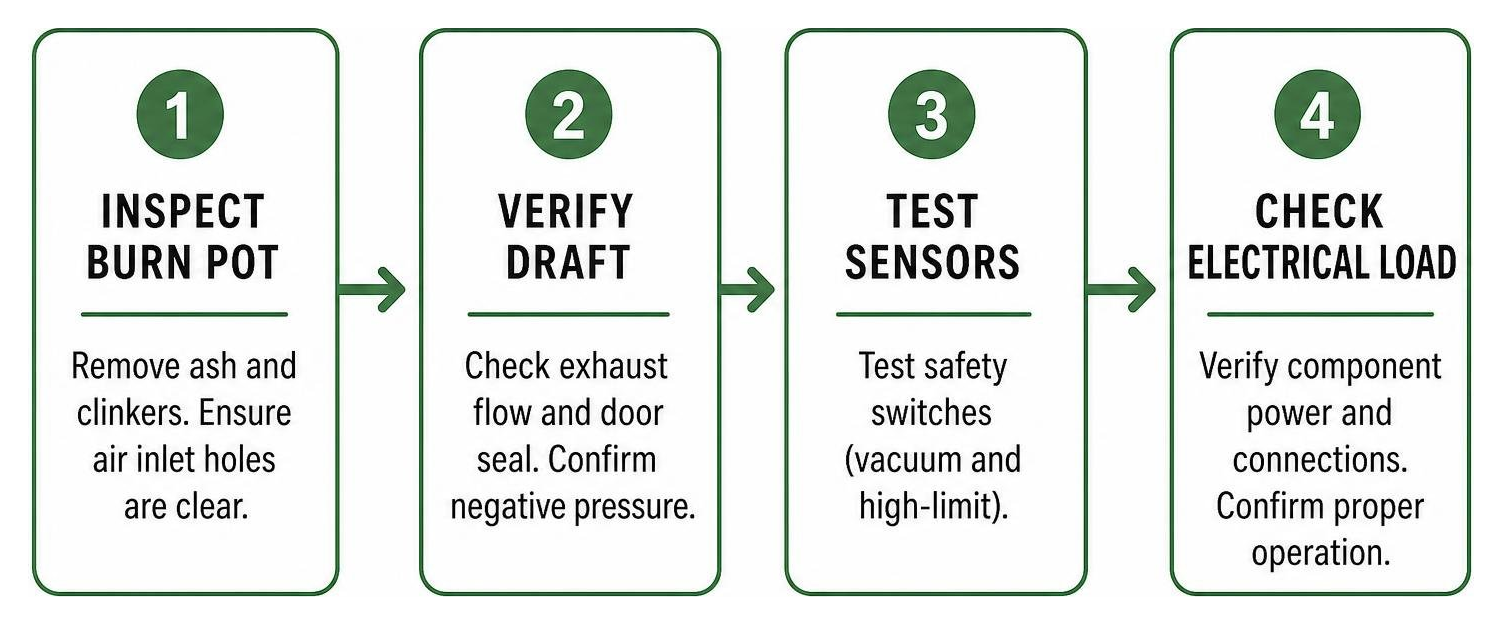
The following table summarizes common symptoms, their likely mechanical or electrical causes, and the diagnostic tests to pinpoint the root issue:
| Symptom | Likely Cause | Diagnostic Test |
|---|---|---|
| No fire, unburned pellets pile up | Faulty electric igniter or blocked burn pot air holes | Check igniter resistance with a multimeter (expect 30–60 ohms); clean air inlets |
| Auger does not turn | Jammed feed chute, faulty feed motor, or open vacuum switch | Inspect auger for foreign objects; test motor leads for 120V/12V power supply |
| Stove shuts down after 10–15 min | Faulty low-limit exhaust thermistor / proof-of-fire sensor | Measure continuity across sensor terminals as exhaust temperature rises |
| Over-temperature light on / shuts down | Convection blower failed or heat exchanger passages packed with ash | Inspect room blower for lint/dust binding; test blower motor capacitor and power |
| Lazy, dark orange flame with black soot | Air restriction, dirty exhaust venting, or failed combustion blower | Inspect intake air damper, clean exhaust pipe, and check combustion fan blades |
Troubleshooting Startup Failures and Over-Temperature Shutdowns
When your stove fails to start, work systematically through the startup cycle. First, inspect the hopper lid interlock switch. Most modern units feature a safety switch that cuts power to the auger whenever the hopper lid is open. If this mechanical switch is misaligned, the auger will not turn.
Next, test the igniter using a digital multimeter. Unplug the stove from wall power, disconnect the two igniter wire leads, and set the meter to measure resistance (ohms). A healthy heating element typically reads between 30 and 60 ohms. If the meter displays infinite resistance (open loop/OL), the internal coil has burned out and requires replacement.
If the stove ignites but shuts down shortly after starting, the proof-of-fire exhaust temperature sensor (thermocouple or low-limit switch) may be failing to detect heat. If this sensor does not reach its target temperature threshold within the startup window, the control board assumes the fire failed to catch and initiates a purge shutdown.
Use the wiring diagram and service specifications for your exact stove model when checking components or ordering replacement parts.
Calibrating Feed Rate, Air Damper, and Fan Speed
Efficient combustion requires a balance between the pellet feed rate and combustion air volume. When these settings drift, heating efficiency drops and ash accumulates rapidly.
- Auger Timing and Feed Rate: The feed rate controls how frequently the auger cycles to drop fuel into the pot. If the feed rate is too high for the draft setting, fuel accumulates faster than it can burn, smothering the flame. Adjust feed trim settings down if pellets spill over the burn pot edges unburned.
- Combustion Air Damper: The air damper controls incoming oxygen. A properly adjusted damper produces a lively, torch-like yellow-white flame with active embers. If the flame is tall, sooty, and sluggish, open the damper slightly to introduce more combustion air. If the flame looks like a blowtorch and throws unburned pellets out of the pot, close the damper slightly.
- Convection Fan Speed: The convection fan circulates room air across the internal heat exchanger. Adjusting the room blower speed balances heat output with whisper-quiet operation. Keeping this fan clean ensures the stove transfers heat into your living area rather than losing it out the flue.
Essential Tools and Preventative Maintenance Procedures
Regular maintenance keeps minor issues from turning into mid-winter breakdowns. Having the right tools on hand makes seasonal maintenance straightforward:
- Ash Vacuum: Standard household vacuums cannot trap ultrafine ash particles and can create a fire hazard. A dedicated ash vacuum uses HEPA-rated, non-combustible filtration.
- Nut Drivers and Socket Sets: 1/4-inch, 5/16-inch, and 7/16-inch sizes are essential for removing motor mounts, blower housings, and combustion access panels.
- Digital Multimeter: Essential for measuring resistance on igniters, testing sensor continuity, and verifying voltage supply to motors.
- Hex Key / Allen Wrench Set: Required for removing fan impellers and tightening auger shaft collar set screws.
- Threadlocker (Medium-Strength Blue): Prevents motor mount and fan collar set screws from vibrating loose during heating cycles.
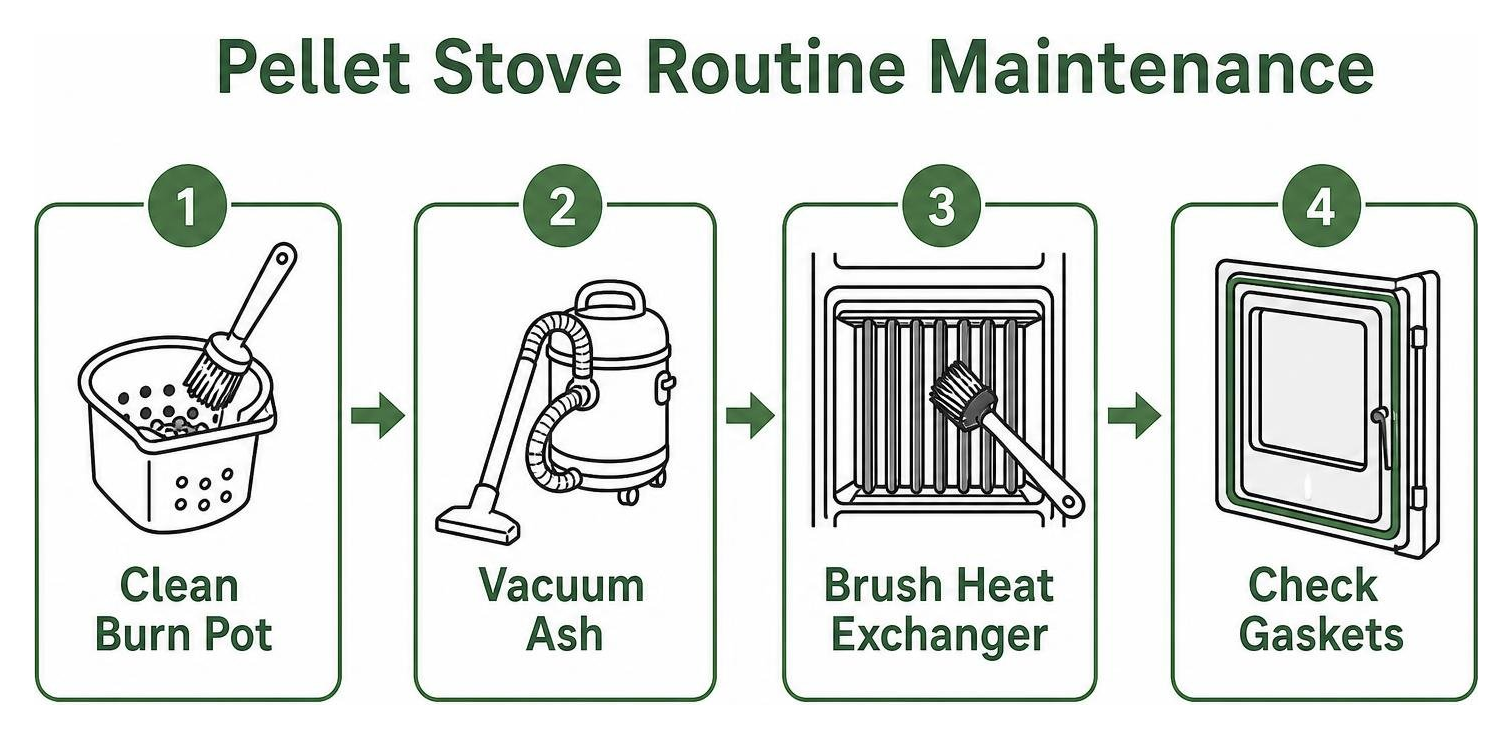
Following a pellet stove cleaning routine helps homeowners remove fly ash from internal baffles before it restricts airflow or contributes to ignition problems.
A seasonal chimney sweeping visit can also help identify buildup in the venting system before it affects draft or indoor air safety.
When your stove needs a professional inspection, pellet stove inspection and service can address worn components, venting concerns, and performance issues before cold weather arrives.
If the flue system needs attention, chimney sweep and repair services can help restore proper exhaust flow and support safe stove operation.
Step-by-Step Component Replacement for Pellet Stove Repair
When diagnostic tests reveal a failed component, follow these step-by-step procedures to complete the replacement safely:
1. Replacing the Combustion (Exhaust) Blower
- Disconnect all electrical power by unplugging the unit.
- Remove the rear or side service panels to expose the exhaust housing.
- Disconnect the wiring harness leading to the blower motor.
- Remove the mounting bolts holding the blower hub to the exhaust housing.
- Scrape away the old silicone or lytherm gasket material completely.
- Install a new mounting gasket, position the replacement blower, and tighten the retaining screws in a cross pattern.
- Reattach the wiring harness and ensure ground wires are firmly seated.
2. Swapping the Auger Feed Motor
- Unplug the stove and empty all pellets from the hopper.
- Locate the auger motor assembly at the base of the hopper drop tube.
- Loosen the Allen set screw on the motor output shaft collar.
- Disconnect the two electrical spade connectors.
- Slide the old motor off the auger drive shaft.
- Align the flat notch of the auger shaft with the set screw on the new motor, apply a drop of threadlocker to the screw threads, and tighten securely.
- Reconnect the electrical leads.
3. Installing a Ceramic Igniter
- Disconnect power and locate the igniter tube below or behind the burn pot housing.
- Loosen the locking set screw or retaining bracket holding the cartridge in place.
- Trace the heat-resistant wires back to the wiring harness or terminal block and disconnect them.
- Carefully slide the old cartridge out of its guide tube.
- Slide the replacement ceramic element into the tube, positioning the tip approximately 1/8 to 1/4 inch recessed from the burn pot air opening (or per manufacturer specifications).
- Tighten the retaining bracket gently to avoid cracking the ceramic casing, then secure the electrical connections.
Safe Battery Backup and Electrical System Management
Modern pellet stoves rely on continuous electric power to drive fans and maintain negative pressure. During winter storm outages, a dedicated 12V deep-cycle battery backup system keeps your heat running safely.
Battery capacity directly determines heating duration during an outage:
- A 30-amp battery system provides roughly 7 to 10 hours of continuous run time on a low to medium heat setting.
- A 100-amp deep-cycle marine/RV battery extends operation up to approximately 30 hours.
When setting up battery backups, ensure the inverter produces a true sine wave output. Modified sine wave inverters can cause AC fan motors to overheat, hum loudly, or experience control board timing errors.
Always plug the stove into a dedicated surge protector to shield sensitive microprocessors from line spikes when primary power returns.
DIY Maintenance vs. Professional Service and Warranties
While routine cleaning and minor adjustments are well within reach for most homeowners, internal electrical diagnostics and sealed combustion repairs often require professional service.
Understanding warranty terms helps protect your investment. Coverage varies by manufacturer and model, so review your owner’s manual or warranty documents before authorizing repairs or replacement parts.
Unauthorized wiring modifications or improper venting installations can void warranty coverage. Professional service helps ensure repairs follow applicable safety and manufacturer requirements.
When your heating system faces complex mechanical failures, professional service can help protect your home and provide reliable heat throughout the winter.
Knowing When to Call an Expert for Pellet Stove Repair
Certain situations pose safety hazards that call for professional attention rather than a DIY fix:
- Persistent Vacuum Dropouts: If the vacuum switch continually trips after thorough cleaning, specialized diagnostic equipment is needed to check draft pressure across the flue run.
- Control Board / Logic Failures: Erratic cycle patterns, unresponsive diagnostic codes, or scorched circuit board traces require electronic bench testing.
- Venting Integrity and Draft Deficiencies: Improper pipe clearance or backdrafting risks releasing dangerous carbon monoxide into living areas.
- Structural Firebox Cracking: Cracked cast iron or warped burn chambers require professional evaluation to determine whether repair or replacement is needed.
If your home uses multiple heating appliances, professional maintenance can help keep every hearth system operating safely throughout the winter.
Frequently Asked Questions About Pellet Stove Issues
Why does my pellet stove shut down 15 minutes after starting?
A shutdown roughly 15 minutes into operation is almost always triggered by the proof-of-fire sensor (low-limit exhaust thermistor). If the sensor is coated in fly ash, disconnected, or failing, the control board cannot detect that ignition was successful. As a safety precaution, it initiates a shutdown cycle to prevent unburned pellets from overfilling the firebox.
What are the main signs that an auger feed motor is failing?
A failing auger motor typically shows clear warning signs:
- High-pitched squealing or grinding from worn gearbox bearings.
- Intermittent pellet delivery, causing the flame to die out before a sudden pile of pellets drops into the pot.
- A motor housing that becomes excessively hot to the touch.
- An auger shaft that binds or stops turning entirely even when supplied with full operating voltage.
How does battery backup run time vary during winter power outages?
Run time depends directly on battery amp-hour capacity and component power draw. Igniters draw high wattage (300–400W) during the first 5 to 10 minutes, while drive motors and fans draw significantly less (50–100W combined) once running.
A 30-amp battery provides 7 to 10 hours of steady operation, while a 100-amp battery can deliver around 30 hours of runtime. You can conserve power during outages by manually lighting the pellets with starting gel to skip the high-draw electric igniter cycle.
Conclusion
Getting your pellet stove inspected and serviced before the arrival of sub-freezing weather is the best way to prevent cold-weather breakdowns. Addressing worn gaskets, testing sensor resistance, clearing exhaust passages, and checking motor wear ahead of time helps ensure consistent, reliable heat all season.
At OHA HVAC, Plumbing, Chimney & Fireplaces, our veteran-founded, family-run team is committed to keeping your home warm and safe. With background-checked technicians, clear communication, a 4.9-star rating backed by over 5,000 verified reviews across Northern Virginia, and 24/7 emergency support, our team is here when you need help.
For help diagnosing a problem or scheduling service, contact our professional pellet stove technicians today.
Need Help With HVAC, Plumbing, Chimney, or Fireplace Service?
OHA is available 24/7 across Fredericksburg, Fairfax, and Northern Virginia.